
We are excited to announce that SDP’s CA Pay Data Report is now available! To help you comply with the DFEH’s new requirement for California employers with 100+ employees, this article will walk you through how to:
- Prepare your employee data
- Run your detail report to double-check your data
- Run your CA Pay Data Report to submit to DFEH
- Finalize your report and submit
Prepare Your Employee Data
Before we dive into running reports, the first step is to make sure you’ve entered all your employee data.
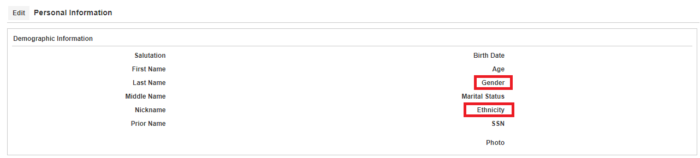
This includes each employee’s gender, ethnicity, EEO class, and CPD Est Hours Per Week (if salaried). You can find these fields in SDP Connect in your employee profiles.
Gender & Ethnicity
Employee Management > Select Employee > Personal Information:
EEO Classification & CPD Estimated Hours
Employee Management > Select Employee > Employment Information
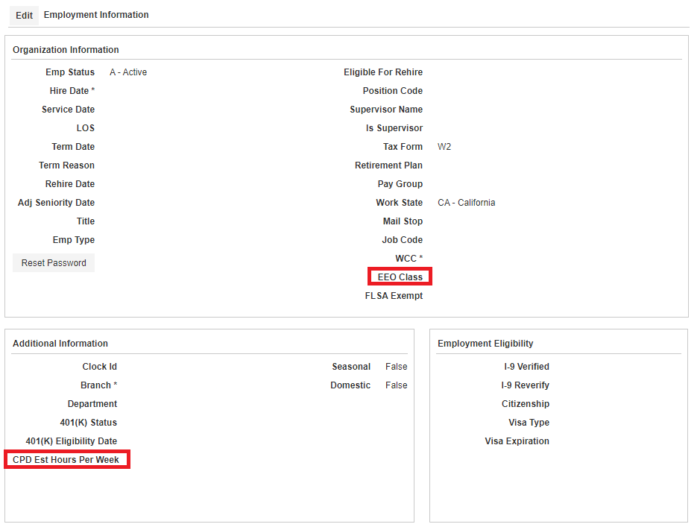
Note: You will only need to enter estimated hours worked per week (i.e. 40) as a whole number for salaried employees in the CPD Est Hours Per Week field. Do not enter any data in this field for hourly employees. Please note that SDP is not able to mass upload employee data for this field.
Run Your Detail Report
After ensuring these fields are updated for all employees, it’s time to run your Detail Report. This will provide you with a break-down of your pay data information by employee so you can do a final check for accuracy and identify any employees who may have incorrect or missing data.
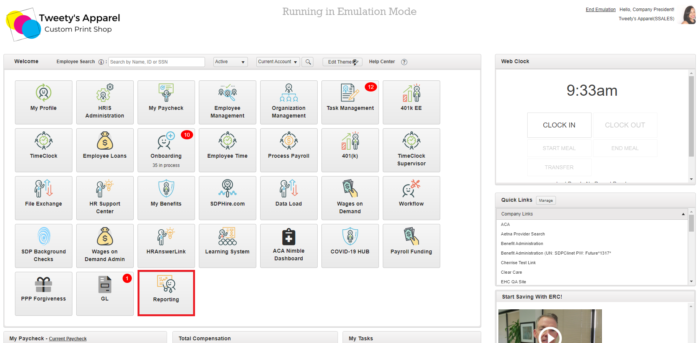
To start, launch the Reporting module from your SDP Connect Admin Portal.
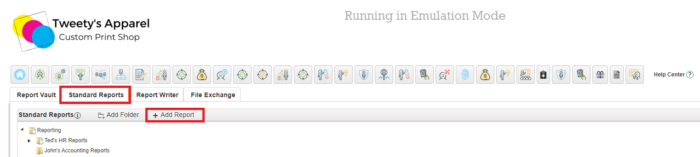
Then, click on the Standard Reports tab at the top of the page. If you do not already have the SDP California Pay Data Detail report listed, then click +Add Report to add it.
In the dialogue box that appears, begin typing SDP California Pay Data Detail until the report name populates in the dropdown. Click on the report from the dropdown menu, then click Ok.

After this, you will receive a confirmation message that the report was added successfully. Click OK to continue.

Once the report has been added to your list of standard reports, select it from your list. (If you just added the report, it will be at the bottom of your list!) Once you click on the report name, scroll up to the top of the page to configure your report.
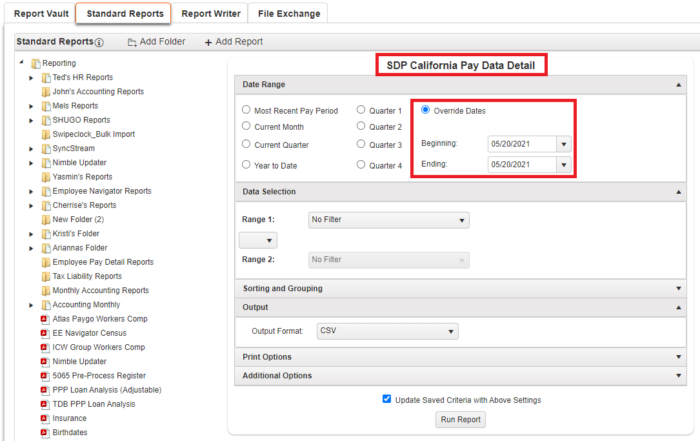
First, you will select Override Dates, and enter the beginning and end dates of your Snapshot Period.
Top Tip: Per the DFEH, the Snapshot Period is a single pay period between October 1, 2020, and December 31, 2020. This should be a typical payroll (i.e. not a pay period where you were closed and working with a skeleton crew). According to the DFEH:
- A specific time period needs to be selected because throughout the course of a year an employer’s employees may change
- An “employee” is an individual on an employer’s payroll, including a part-time individual, whom the employer is required to include in an EEO-1 Report and for whom the employer is required to withhold federal social security taxes from that individual’s wages
- You can learn more about the DFEH reporting requirements in the California Pay Data Reporting User Guide here
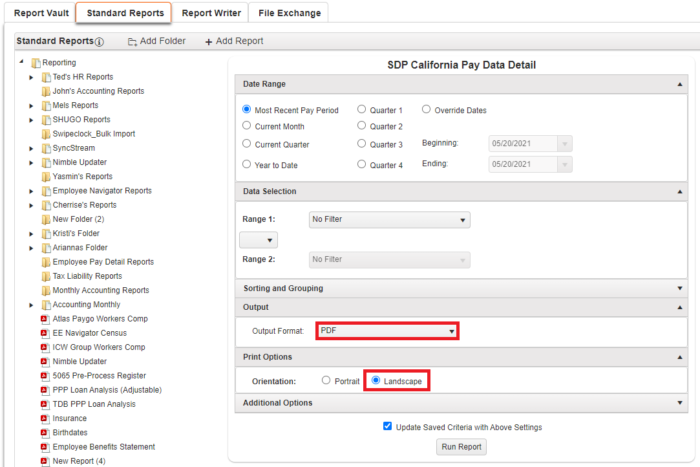
After this, select PDF as your Output Format. (No changes need to be made in the Data Selection or Sorting and Grouping sections.) Then, select Landscape orientation under Print Options.
Next, we’ll move on to the Additional Options configuration. For the most part, you will be able to leave this section with the default settings. However, if you do have specific configuration needs, this is where you can accommodate those.
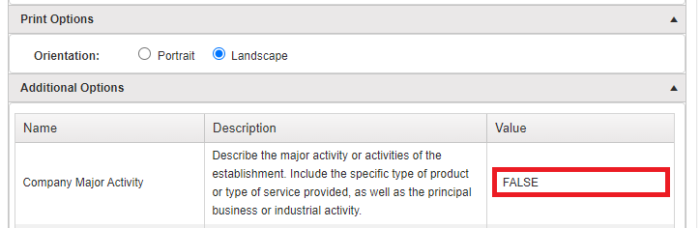
Major Activity
You will need to replace the text “FALSE” with a description of the major activity or activities of your business. The description can be up to 500 characters in length. For example, on the DFEH sample template, they include the description “Salt and mineral mining” for their sample company “John Doe’s Salt Mine”.
In the case of this example, John Doe’s Salt Mine would simply replace the “FALSE” text in the Value column with “Salt and mineral mining”.
Top Tip: DFEH advises against using any commas in your description as the final report you upload will be in CSV format (commas are used to separate columns in a CSV file).
Ethnicity Codes & Job Codes
Next are Ethnicity Codes and Job Codes. SDP has defaulted our report to look for the code values specified by DFEH (see below).
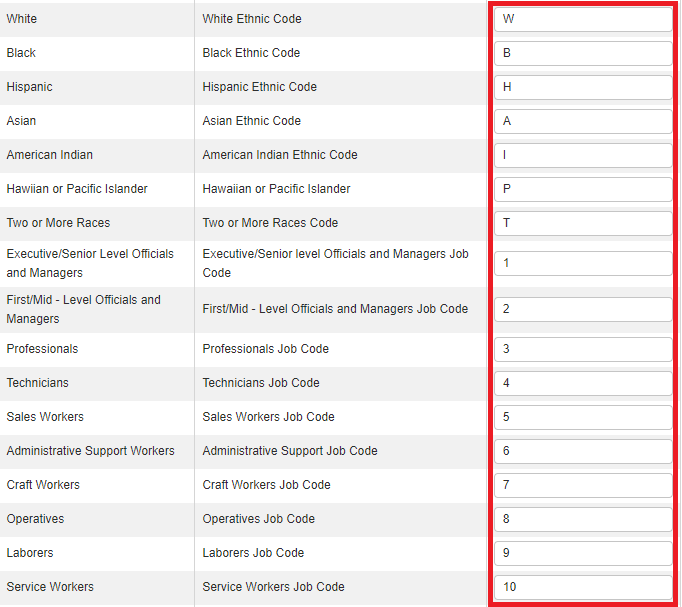
However, if your organization is using different codes (i.e. if you use “WH” for White instead of “W” or “1.1” instead of “1” for Executive/Senior-level officials), you will need to edit these here to ensure they match the codes in your employee profiles. For example:
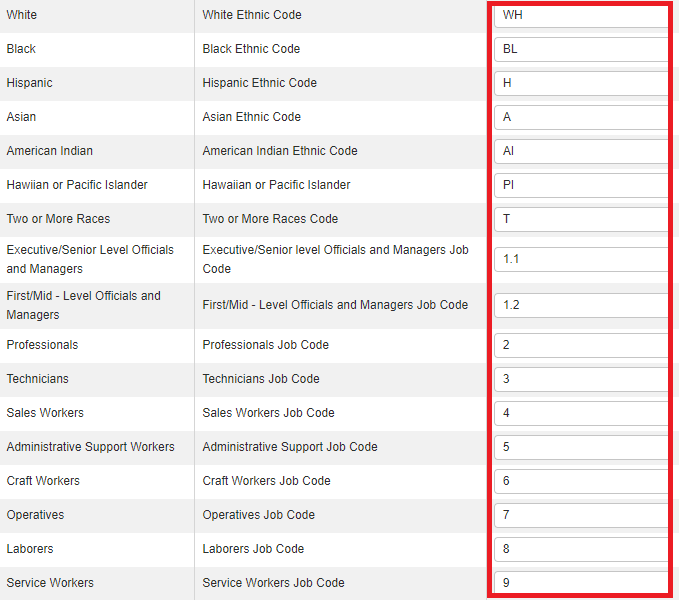
Top Tip: Remember, for your report to run smoothly, the values in this section must correspond to the codes used in your Ethnicity and EEO Class fields in your employee profiles!
Child Companies
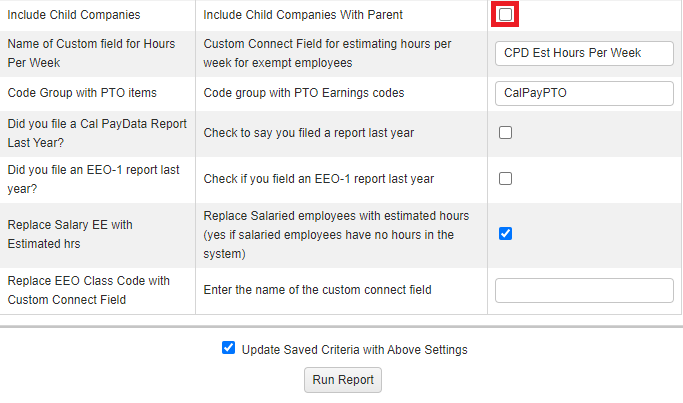
If you have multiple COIDs with SDP, then you can check the box to Include Child Companies if you would like to group your COIDs together in a single report.
Otherwise, you can leave this unchecked and run each COID’s report separately.
Note: You must be an Admin under all parent/child companies in order to select this option.
Custom Field, Code Group, & Salary EE Estimated Hours
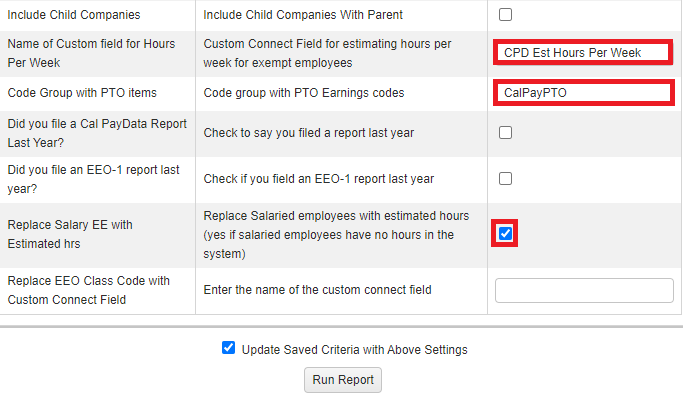
The following sections are defaults based on our report configuration. Be sure that each of the sections below include the bolded values to ensure your report runs smoothly:
- Name of Custom field for Hours Per Week – CPD Est Hours Per Week
- Code Group with PTO items – CalPayPTO
- Replace Salary EE with Estimated hrs – Checked
Past Filing of California Pay Data Reports and EEO-1 Report
Finally, you can check off if you filed a CA Pay Data Report last year. (As this is the first year this program has been in effect, you should leave this unchecked for this reporting year.)
Then, you can check off if you filed an EEO-1 report last year.
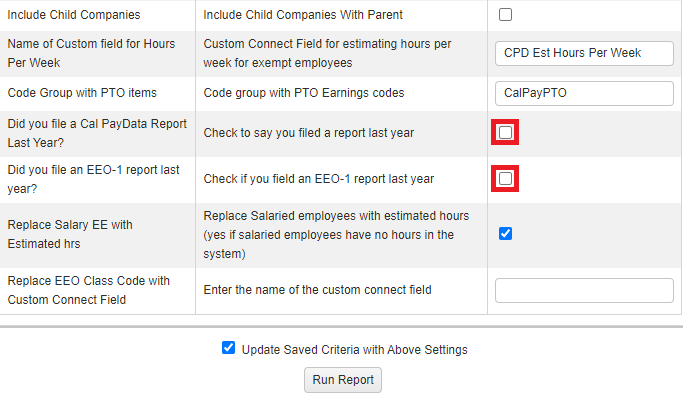
Then, click Run Report. Your report should automatically download.
Top Tip: Make sure you have any popup blockers turned off as this will prevent your report from downloading!

After your report has downloaded, open the PDF to review the data:
- Confirm all employees’ gender and ethnicity codes are properly assigned
- If there are any 0 values in the Hours column, you will need to go add in the employee’s CPD Est Hours Per Week on their Employee Profile
- If there are any X values in the employee’s gender, ethnicity, or EEO Class columns, you will need to go add in this information to the employee’s Employee Profile
Once you have validated that your Detail Report is complete and accurate, it’s time to run your CA Pay Data Report to Submit to DFEH!
Run Your CA Pay Data Report to Submit to DFEH
To do this, we will go back to the Standard Reports tab in your Reporting module. If you do not already have the SDP California Pay Data Reporting report listed, then click +Add Report to add it.
Note: This is a different report than the SDP California Pay Data Detail report we just ran!
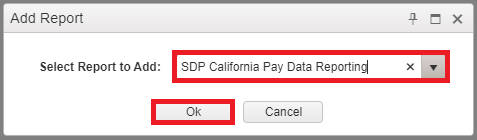
In the dialogue box that appears, begin typing SDP California Pay Data Reporting until the report name populates in the dropdown. Click on the report from the dropdown menu, then click Ok.
After this, you will receive a confirmation message that the report was added successfully. Click OK to continue.
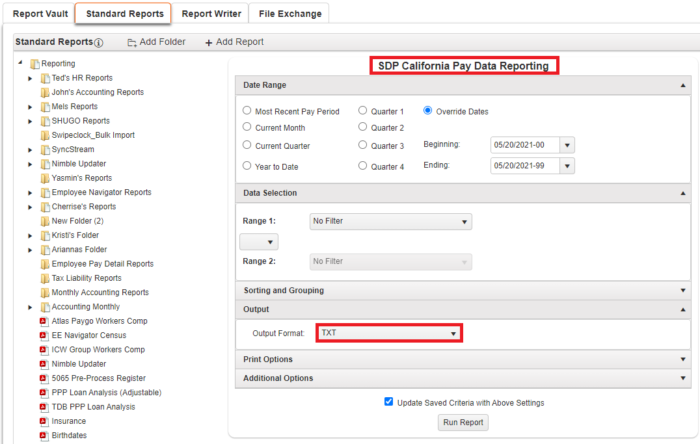
Once the report has been added to your list of standard reports, select it from your list. (If you just added the report, it will be at the bottom of your list!) Once you click on the report name, scroll up to the top of the page to configure your report.
Repeat the report configuration following the same steps as used for the SDP California Pay Data Detail Report except for:
1. The report’s Output Format should be TXT.
Note: In order for your report to run properly, you must select TXT as your output format in this section. However, our system will automatically convert the file to CSV as it processes so you will be able to upload it to the DFEH portal.
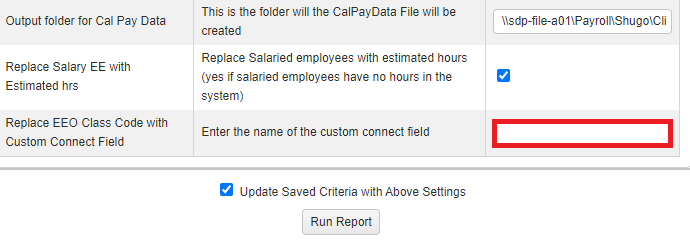
2. The report’s Output folder for Cal Pay Data under Additional Options should be left as is (\\sdp-file-a01\Payroll\Shugo\Clients\YOURCOMPANYCODE). For example, if your COID and company name was A123 Connie’s Cupcakes, then this section would say \\sdp-file-a01\Payroll\Shugo\Clients\A123.

3. The Replace EEO Class Code with Custom Connect Field field under Additional Options should be left blank unless a member of SDP’s IT department has reached out to you to enter data here.
All other components of the report configuration should match your Detail report exactly.
Top Tip: It may help to have your Detail report configuration open in another tab so you can toggle back and forth to copy over your report details!
After you have updated all fields in the Date Range, Print Options, and Additional Options sections to match your Detail report, click Run Report.
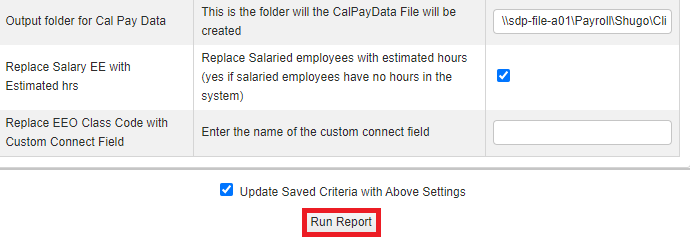
Your finalized report will then be sent to your account’s secure email contacts. Please allow for up to 30-60 minutes to receive your report via secure email.
Finalize Your Report and Submit
After your report has downloaded, open the CSV to finalize the data. You will need to complete any missing information in Section I: Employer Information.
Then, scroll down to Section II.A – Establishment Information and Section II.B – Employee Detail to verify the report data is complete and accurate.
Top Tip: Again, remember not to include any commas as you complete your report information since commas are used to separate columns in a CSV file!
Upload to DFEH Portal
Once you have finished finalizing your report, you will log into the DFEH’s California Pay Data Reporting Portal here.
Note: You can find more detailed instructions on uploading your report to the DFEH portal including pictures beginning on page 25 of the CA Pay Data Reporting Portal User Guide here.
The Portal will assign a Submission ID to the report you are uploading. Be sure to securely record your Submission ID as it will be required when re-entering the Portal to view or edit a non-certified report, and DFEH cannot provide an employer with their Submission ID if lost or forgotten.
After recording your Submission ID, select Continue to move on to the next step.
Enter your Employer Name to begin the upload process, then select Upload CSV File. The portal will then issue a prompt to select and upload your CSV file.
After your uploaded file is processed, the Data Record Status will show either:
- Validated if the Portal confirmed that all records in the file uploaded without errors and report is ready for certification
- Validation Errors if the uploaded file contains errors that must be corrected before it can be certified
Whether the file uploaded with or without errors, you can withdraw the file from your Portal at any time before certification by clicking Withdraw.
Correcting Data Errors
If the Portal’s validation process found any errors in your CSV file, you can correct the errors from within your Portal.
To begin, select Edit in the Action column next to your Validation Errors record status.
Note: If you prefer, you can Withdraw your report, fix the errors in the source file, and upload a new file to the Portal instead of correcting the data errors within the Portal.
The Portal will display a message indicating the total number of Section I and Section II data records that failed validation. All data records with errors will have a Data Record Status of Validation Errors which you can correct by selecting Edit to make the necessary changes.
After all data records with Validation Errors have been corrected, the file’s Data Record Status will update to Validated.
Certifying Your Report
Once your report is Validated, you can begin the certification process by selecting Certify.
Note: After a report is certified and submitted to DFEH, it will no longer be viewable in the Portal. However, on the final page in the certification process you will have the option to download your certified Pay Data Report.
To certify and submit your report, enter the required information about the certifying official and add any optional clarifying remarks. After entering your data, select Certify.
A popup will display asking for confirmation to certify and submit your report. Select Yes to confirm your certification and submission.
The Portal will then display a thank you page indicating that your report was successfully certified and submitted to DFEH. To download a copy of the certified and submitted report, click the Final Report link.
DFEH recommends printing this page for your records. Then, select Exit to return to the Portal Welcome page. After exiting, the Submission ID will no longer be valid for reentering the Portal and your certified report will no longer be accessible in the Portal.
Check it off your To-Do List!
Congratulations, you’ve officially submitted your first California Pay Data Report! We hope you found this article helpful for complying with this new employer requirement. For more information, check out:
And don’t forget to follow us on Facebook, Twitter, and LinkedIn for even more business tips & news!
Photo by Alexander Suhorucov from Pexels